Tutorial · DIY Lab
Making music with Arduino: from buzzer to MIDI
How to get sound out of an Arduino, from a buzzer with tone() to turning sensors into controllers. A practical walkthrough of three levels, no expensive hardware required.
Making music with code is satisfying, but making it with a gadget you hold in your hand is even more so. Arduino is a tool that bridges that gap well: a cheap board, a simple environment, and the possibility of going from “hello world” to something that actually sounds in an afternoon. Here I describe the three levels worth climbing through, from simplest to most capable.
Level 1: direct sound with tone()
The first sound comes from a piezoelectric buzzer — a component that costs
next to nothing — and a single function: tone(). You pass it the pin the
buzzer is connected to and a frequency in hertz, and the board generates a square
wave at that frequency. 440 Hz is the reference A; increase the number and the
pitch goes up.
tone(8, 440);   // start playing A on pin 8
delay(500);     // half a second
noTone(8);      // silence
By chaining frequencies and silences with delay() you already have a melody.
It is rudimentary — square wave, only one tone at a time — but it is real music
coming out of your code. The first little tune is surprisingly satisfying.
Level 2: letting the physical world take control
An Arduino that only plays a fixed melody is a music box. The magic arrives when it reads sensors and lets the environment control the sound. This is where the board earns its place in the lab.
The simplest case is a potentiometer: read it with analogRead(), which
returns a number, and convert that number to a frequency. Turning the knob
changes the note in real time. From there, everything is just swapping the
sensor:
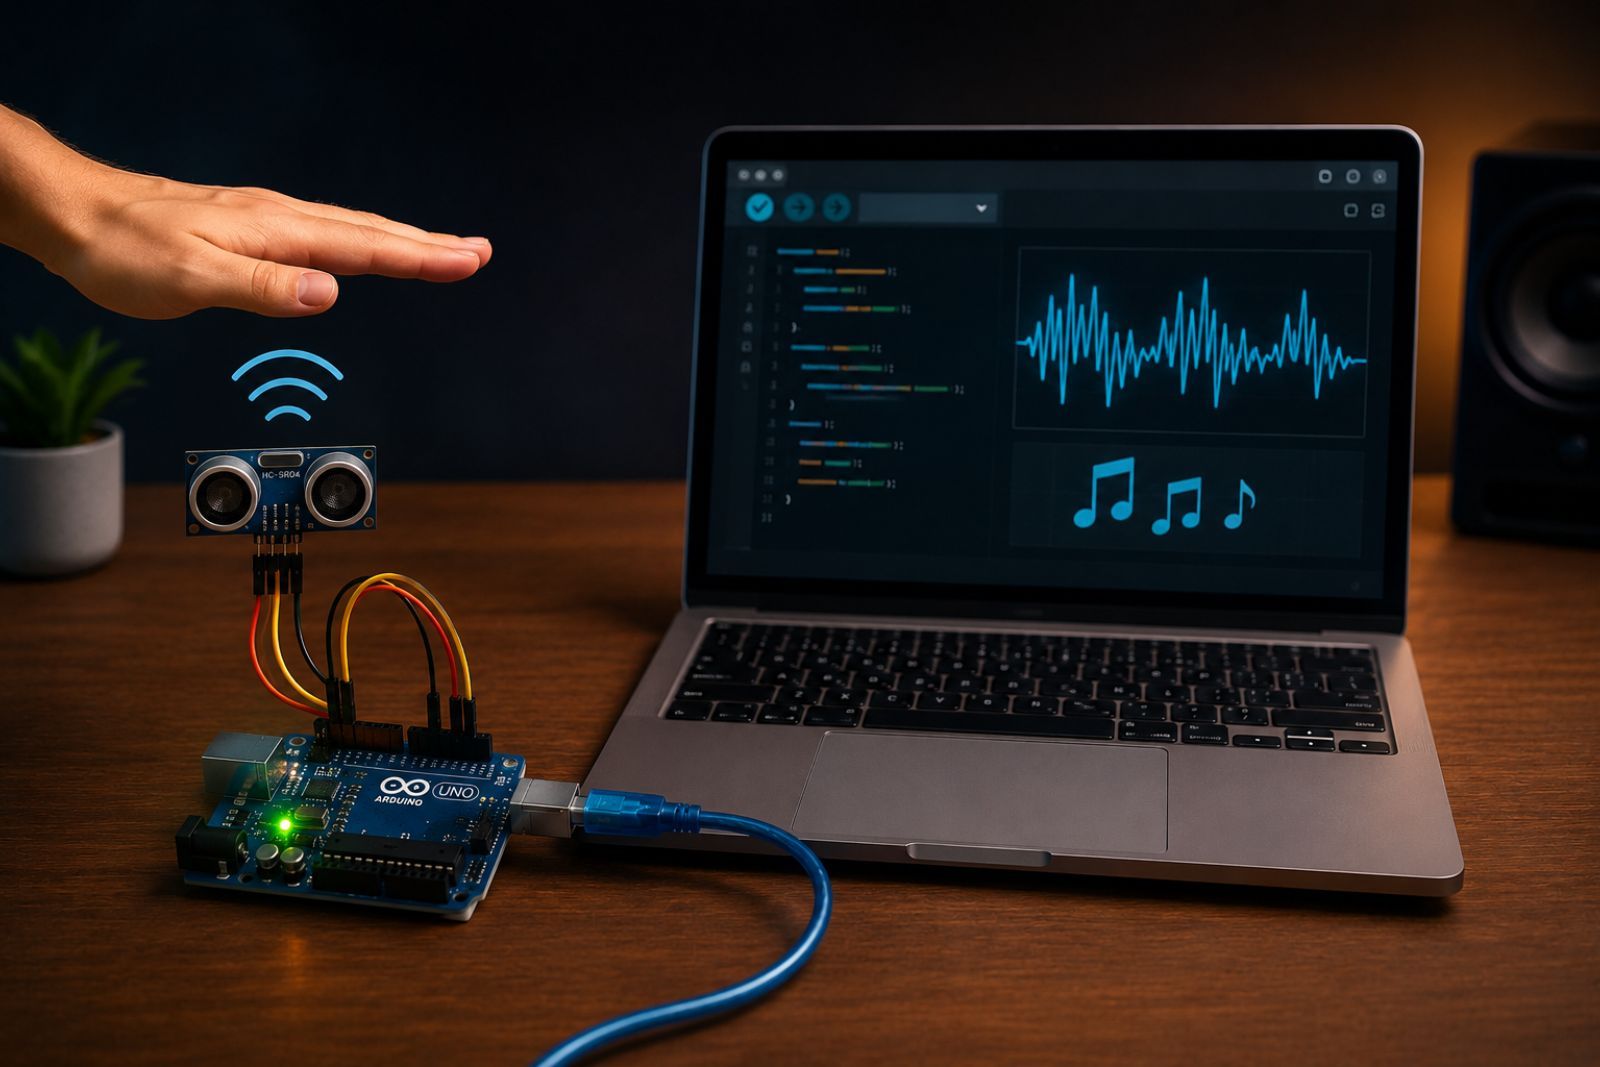
- A distance sensor using ultrasound turns the gesture of moving your hand closer or farther away into pitch: a no-touch air instrument, similar in spirit to a home-built theremin.
- A light sensor (an LDR) makes shadow modulate the sound.
- An accelerometer turns the motion of the board itself into music.
The pattern is always the same: read a physical quantity, map it to a musical parameter, make sound. That translation is, in miniature, music computing put directly in your hands: reading the physical world and turning it into MIDI instructions.
Level 3: speaking MIDI
The buzzer has a ceiling: an ugly waveform and only one voice. The quality jump comes from stopping the board from generating sound and instead turning Arduino into a controller: one that reads sensors and, rather than making noise, sends MIDI messages to a computer, where a decent synthesiser provides the actual timbre.
The idea fits naturally with what we saw about MIDI: the Arduino sends no audio, only instructions — “start this note, at this velocity.” The sensor decides which note; the computer decides how it sounds. You separate gesture from timbre, and suddenly your few-euro gadget controls any virtual instrument.
The three levels at a glance
| Level | Hardware | Technique | Output |
|---|---|---|---|
| 1 | Piezoelectric buzzer | tone() + delay() | Monophonic melody |
| 2 | Sensor (potentiometer, ultrasound, LDR) | analogRead() + mapping | Real-time control |
| 3 | No speaker (USB or serial) | MIDI protocol | External synthesiser |
Where to start
You do not need to buy anything expensive for the first step: a board, a buzzer, a cable, and the official IDE are enough for level 1. Level 2 needs a cheap sensor. Level 3 mainly requires understanding what MIDI is before you implement it.
Each level works on its own. You do not have to reach MIDI to enjoy this: with a buzzer and twenty lines of code you are already making music with your hands.